|
Step 1. Choose the appropriate place to install the pump and Flow Monitor:
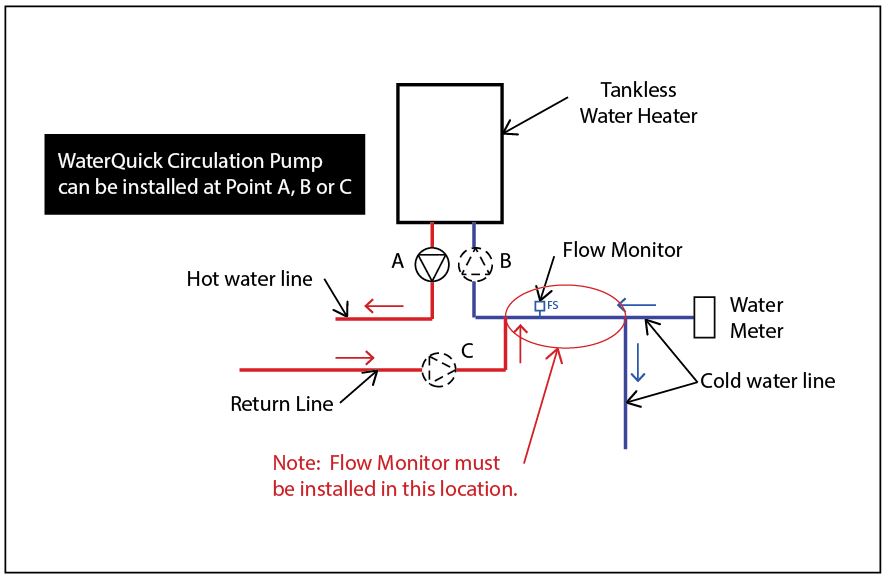
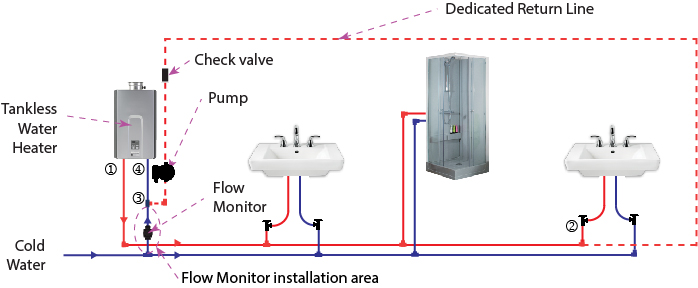
Please refer to the Figure below for installation options. The circulation pump can be installed at Point A (hot water out), Point B (cold water in) or Point C (return line). Point C is the traditional installation point, but Points A and B are valid locations as well.
Ease of installation is the most important consideration when deciding. For the purposes of this manual the pump will be installed at Point C (hot water out).
Step 2. Turn off water heater.:
Electric - turn off power by either unplugging the water heater or shutting off the appropriate breaker.
Gas, propane or heating oil - turn off water heater and make sure the pilot light is turned off.
Step 3. Turn off water:
Turn off the water to the water heater. In most cases there is a valve located above (or below for tankless) the water heater on the cold water supply line.
Step 4. Drain the hot water lines:
Turn on any hot water faucet in the house and let it run until the water stops flowing. Leave the faucet on for the duration of the installation. Drain remaining hot water using the hot water spigot on the water heater.
Note: If water continues to flow, check to make sure that the water has been completely turned off. If the valve does not shut off the water flow completely turn off the valve supplying water to the house or at the water meter.
Step 5. Cut the water line where the pump is to be installed::
Remove a section of pipe equivalent to the length of the pump and Flow Monitor assembled plus any extra length for required fittings.
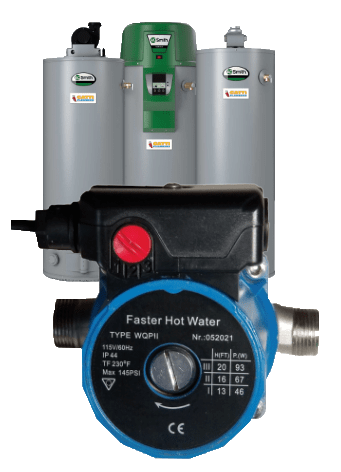
Step 6. Orientation of pump and Flow Monitor:
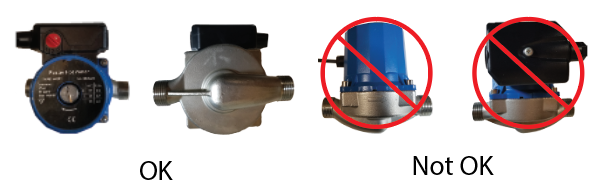
The volute of the pump (silver part) can be installed in either a vertical or horizontal orientation. If it is installed vertically the can (round blue part) will always be horizontal.
If the pump is installed horizontally the can (round blue part) must be installed in a horizontal orientation. See Figure below.
The orientation of the pump can be changed by unscrewing the 4 hex head bolts that hold the can and volute together and rotating the can as necessary. The black electrical box with the 3-speed toggle switch does not need to be on top.
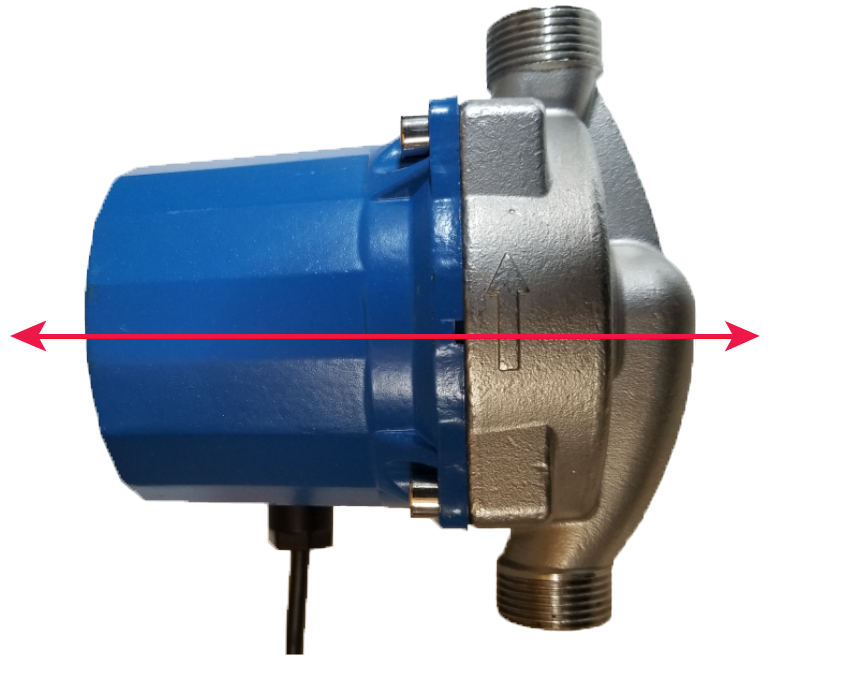
Make sure the arrows on the pump and Flow Monitor are pointing in the direction of flow. Use proper straps for support if necessary.
Step 7. Install the Flow Monitor:
Proper location of the Flow Monitor is critical to the operation of the system. The Flow Monitor must be installed outside the recirculation loop.
In Figure 3 below the loop includes 1-2,2-3,3-4,4-1. The pump will not stop once it starts if the Flow Monitor is installed anywhere within the loop. It must be installed in the cold-water line outside of the loop. Shown as the Flow Monitor installation area in the Figure below.
|
Hot Water Circulation Loop
|
Insert 1 gasket in the female end of the Flow Monitor (an extra gasket is provided). Using the appropriate fittings (not included) install the Flow Monitor in the cold-water line as indicated above. Do not over tighten.
Warning: do not use a wrench on the brass body of the Flow Monitor and do not overtighten.
Step 8. Complete connections and turn on water:
Make sure that a hot water faucet is turned on in the house and then slowly turn the water back on to the water heater. Check for leaks and repair as necessary. Leave the water running until all of the air has been purged from the water pipes. Turn off the faucet.
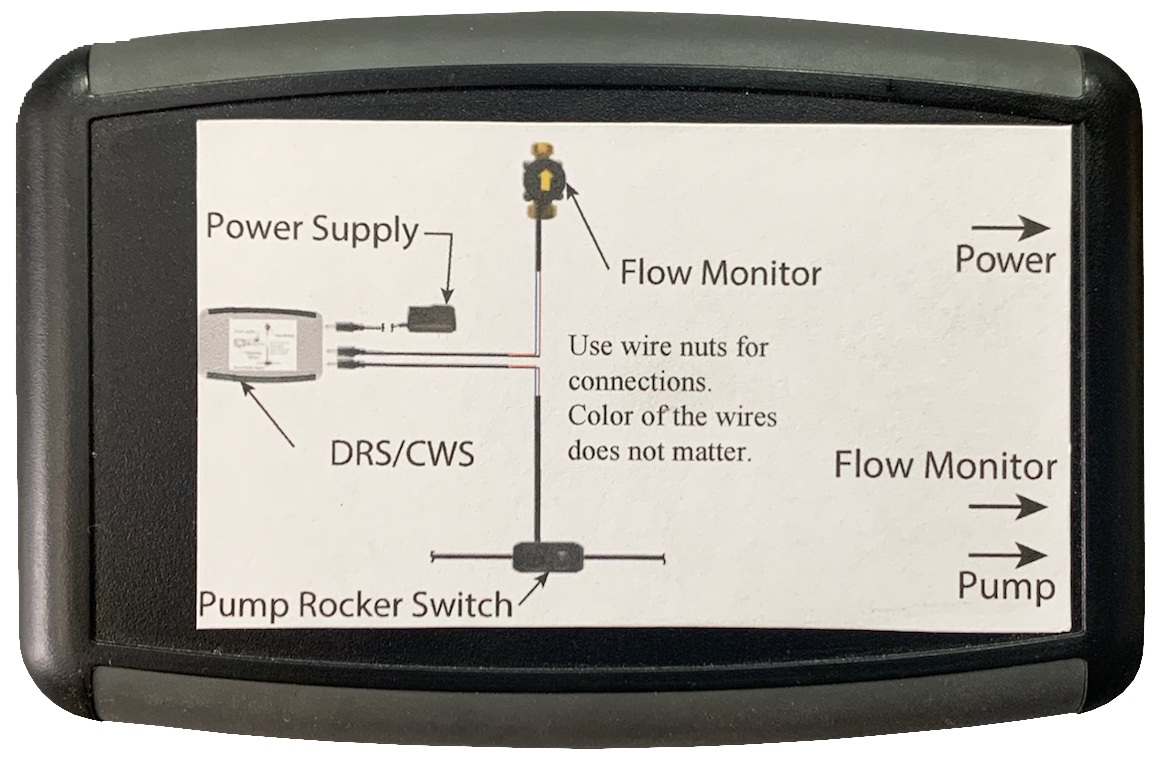
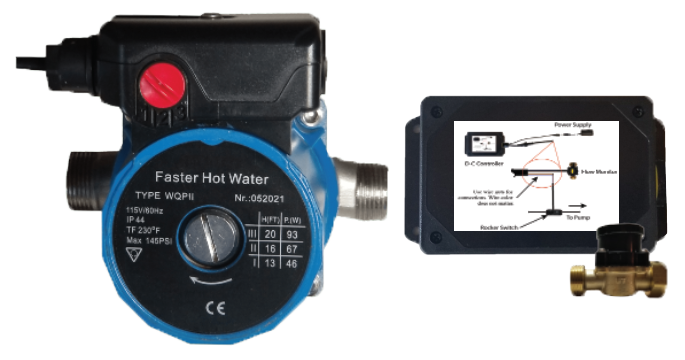
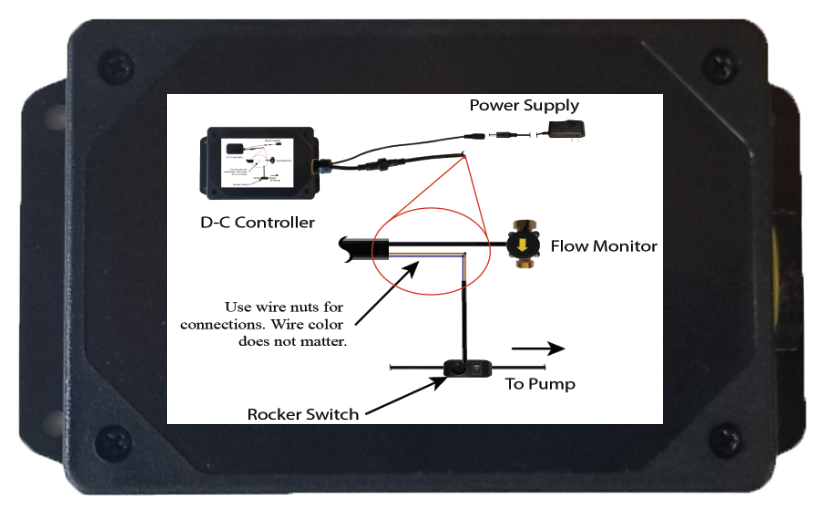
Step 9. Assemble the Pump Manager, Flow Monitor and Power Supply as shown below:
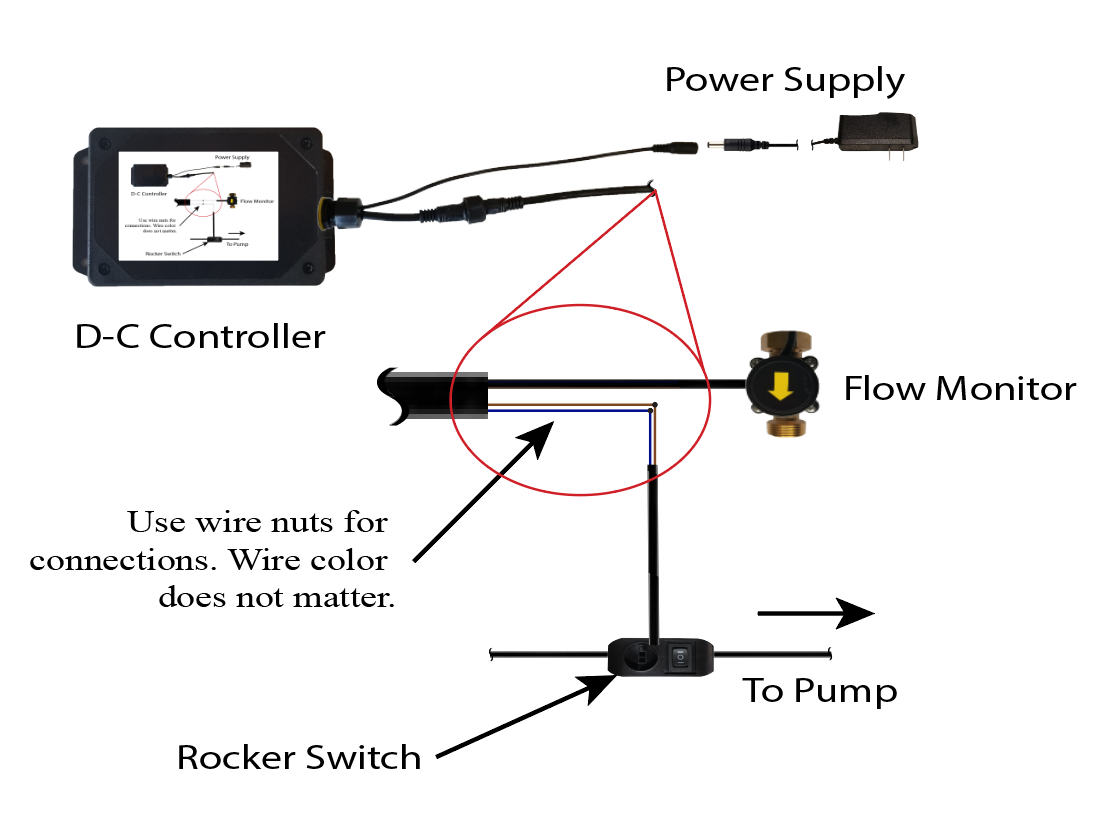
Step 10. Connect the pump and the Pump Manager:
Plug the Pump Manager and pump into properly grounded 110 vAC outlets.
Step 11. Test D-C-Tankless System:
Turn on any hot water faucet in the house for 1 second and turn it off. Pump will continue to operate for approximately 180 seconds after the faucet has been turned off.
Note: The 180 second timer will not start until all demand for hot water has ended.
|